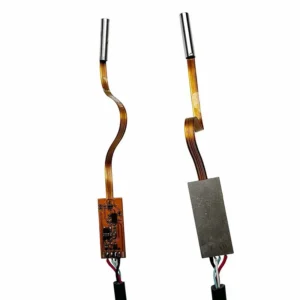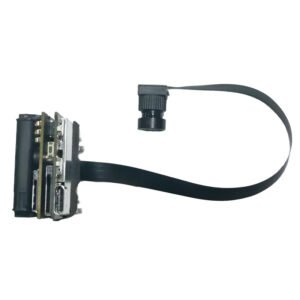


Thermal Imaging Camera Modules: A Practical Guide for Drones, FPV Systems, Night Vision and Industrial Inspection
A drone flies over an industrial rooftop just after sunset. Through its ordinary camera, the surface looks uniform. Through a thermal imaging camera, several areas show noticeably different heat patterns. That contrast is why thermal imaging has become useful in aerial inspection, industrial maintenance, security and embedded vision systems. But choosing the right thermal camera module is not simply a matter of buying the highest-resolution sensor available. A module that performs well on a stationary inspection terminal may be too heavy, power-hungry or difficult to integrate into a compact drone. Another module may offer a convenient video output but lack the temperature measurement functions required for a particular inspection workflow. For engineers and OEM buyers, the important questions are practical: What thermal detail must the camera detect? How far away is the target? What video interface does the host support? What are the power, weight and environmental limits? At Shenzhen Brilliant CMOS Technology Co., Ltd., our product range includes a 640 infrared CVBS/USB night vision thermal imaging camera core for buyers evaluating embedded thermal imaging solutions. This guide explains the technical considerations that matter when selecting a thermal imaging camera for drones, FPV systems, industrial inspection equipment and OEM applications. In this guide What a thermal imaging camera module does Thermal imaging versus conventional night vision Understanding thermal resolution and detector sensitivity Choosing a thermal lens and field of view USB versus CVBS thermal camera interfaces Thermal drone camera integration FPV drone camera module considerations Industrial inspection and embedded thermal imaging Image processing, calibration and temperature measurement Thermal camera module comparison A practical OEM selection checklist Frequently asked questions 1. What a thermal imaging camera module actually does A thermal imaging camera detects infrared radiation emitted by objects and converts that information into an image. Most everyday objects emit infrared energy. The amount detected by a camera depends on factors including the object’s temperature, surface properties, the surrounding environment and the sensor’s operating wavelength range. Unlike a standard CMOS camera, a thermal camera does not need visible light to show temperature-related contrast. This makes thermal imaging particularly useful when the information you need is not visible to the human eye. For example, a thermal camera may help an operator identify unusual heating around electrical equipment, examine temperature patterns across a building surface or locate a warm object against cooler surroundings. However, a thermal image is not automatically an accurate temperature measurement. That requires appropriate detector calibration, radiometric processing and measurement settings. What is inside a thermal imaging camera module? A typical thermal imaging module combines several components: Infrared detector: Senses radiation within the detector’s specified infrared band. Infrared optics: Focuses incoming radiation onto the detector. Signal processing electronics: Converts sensor output into usable image data. Image correction functions: Compensate for variations between detector pixels. Video output interface: Connects the module to a display, host processor or recording system. Mechanical assembly: Supports the optics, detector and electrical connections. Some thermal camera modules also include temperature measurement functions, configurable color palettes, digital controls or other processing features. These capabilities vary by model and must be checked against the actual product specifications. For OEM developers, the module is only one part of the finished system. The host processor, software, power supply, enclosure and user interface all contribute to final performance. 2. Thermal imaging versus conventional night vision Thermal imaging and night vision are frequently treated as the same technology, but they operate differently. A conventional low-light camera uses available visible light or, in some designs, reflected near-infrared illumination. A thermal imaging camera detects emitted infrared radiation, generally in a different wavelength range. This distinction matters when selecting a camera for an application that must work in darkness. Feature Thermal imaging camera Conventional low-light or IR camera Imaging method Detects emitted infrared radiation Captures visible or reflected near-infrared light Needs external illumination Not generally required for thermal contrast Often required in complete darkness Image appearance Temperature-related patterns Recognizable visual shapes and textures Color information Usually represented using artificial palettes May provide color or monochrome images Temperature measurement Possible with suitable radiometric designs Not normally available Common applications Thermal inspection, detection and monitoring Surveillance, identification and visual recording Which technology should you choose? Choose thermal imaging when your application depends on detecting thermal differences. Choose conventional imaging when identifying visual details, reading labels, recognizing colors or capturing ordinary video is the primary requirement. In some products, combining both technologies produces a more useful system than relying on either camera alone. For example, a drone could use a conventional camera to document the visible condition of a structure and a thermal camera to highlight areas requiring closer inspection. The two image streams serve different purposes. 3. Thermal resolution: why pixel count is only the beginning When evaluating a thermal imaging camera, resolution is one of the most visible specifications. Common thermal detector formats include 160 × 120, 256 × 192, 320 × 240 and 640 × 512 pixels, although other formats are available. A higher-resolution detector captures more spatial information across the scene. That can help when examining small objects, viewing targets at a distance or inspecting a broad area from an elevated position. CBRI Tech offers a 640 infrared CVBS/USB thermal imaging camera core, which belongs to the higher-resolution category commonly considered for demanding embedded thermal imaging projects. Why more pixels matter for a thermal drone Imagine inspecting a large industrial rooftop. With a low-resolution thermal camera, a small hot area may occupy only a few pixels, making it difficult to distinguish from surrounding surfaces. A higher-resolution detector can provide more information about the same target, assuming the lens and viewing distance are suitable. This is particularly important when the camera is mounted on a drone, because flight altitude directly affects the amount of detail captured. However, higher resolution also creates additional requirements for image processing, video transmission, storage and potentially power consumption. The correct choice depends on the smallest feature your application must reliably observe. Do not confuse thermal resolution with visible-light resolution